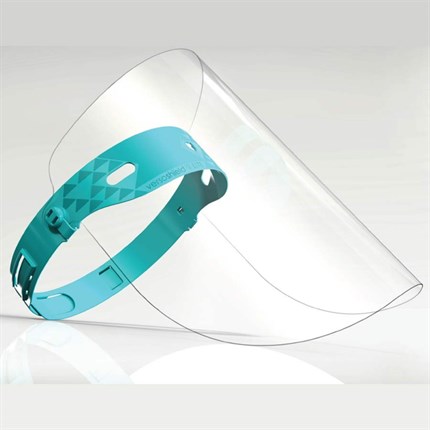
Assembly Instructions:
STEP 1: Remove protective film from Visor (B). Lay the Head
Band (A) down, facing up and locate the square peg on the left hand side. Place the hole in the visor over the peg
STEP 2: Rotate and Snap the attached cap over the visor to secure it in place. Repeat the same process on the opposite side:
STEP 3: Loop the band and feed the end under the ratchet tab whilst lifting it using the tab, as shown below. Push the band through a short amount and release the tab.
STEP 4: Now place the headband over your head, with the visor in front of your face, and pull the band through the
ratchet until it fits comfortably & securely. Tuck in any excess.
Cleaning Instructions:
The recommended cleaning procedure for this product is to immerse the assembled product in warm water with a mild detergent and gently scrub.
IMPORTANT!
Ensure the clips are both correctly aligned within the square hole before pushing down
This product is designed to provide some protection against contact with airborne droplets that may constitute a biological hazard. However, always remember that no item of PPE can provide full protection and care must always be taken while carrying out the risk-related activity. Never use this visor for protection against other hazards for which the product is not design for or tested against
FITTING AND SIZING – To put on and take off the product, simply place the head band over your head with the visor in front of your face and adjust the fit using the adjustment ratchet at the rear. Slowly pull the band through the ratchet until a secure, but comfortable, position is found. Only wear products of a suitable size that are correctly adjusted. Products which are too loose may not stay in place and if too tight will be uncomfortable. The size of the head band can be adjusted to fit most adults.
CLEANING – Only use the following recommended cleaning treatment - Rinse with warm soapy water NEVER use solvent based
cleaning agents.